A blank white canvas is nice sometimes, but if you’re asking for student responses in video form, it can be helpful to have some kind of template for their response. This would be easy using AirDrop (if we were in school), so how do you create and send templates while we’re all working from home?
If you’re wondering if there is a video, you bet there is.
Start with Google Slides
Explain Edu allows you to import files to use as slides in your projects. In this post, I’ll show how to import some Google Slides you already have prepared for students to use as a templated response in Explain Edu.
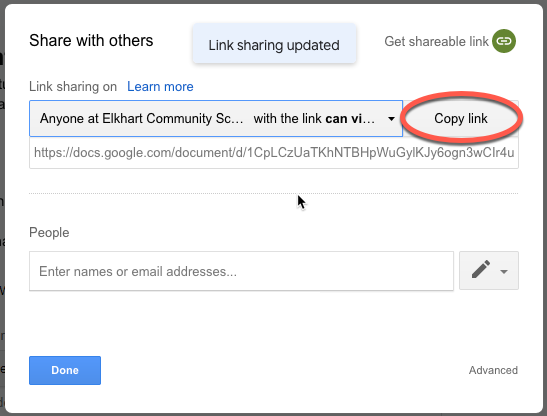
To start, make a slideshow. You don’t have to start from scratch…you can use slides you already have prepared and modify them for individual responses by students. Once you have your slides finished, share them with students as View Only. An easy way to do this is to set up a View Only folder shared with your class. Jus drop the presentation in there.
Import into Explain Edu
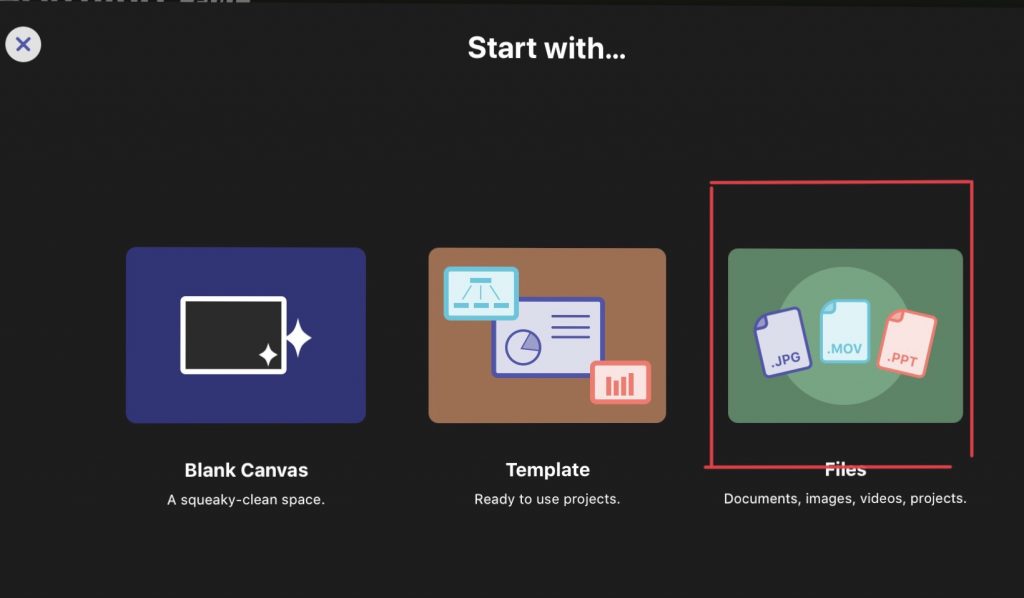
Once your slides have been shared, they can be imported into Explain Edu. When you open the app, tap on New Project and then choose Files.
For the source, tap on GDrive and then find the file you want to import.
Tap on the file you want to import and wait for the checkmark to appear (the file downloads in the background and can take a minute). Then, tap Import.
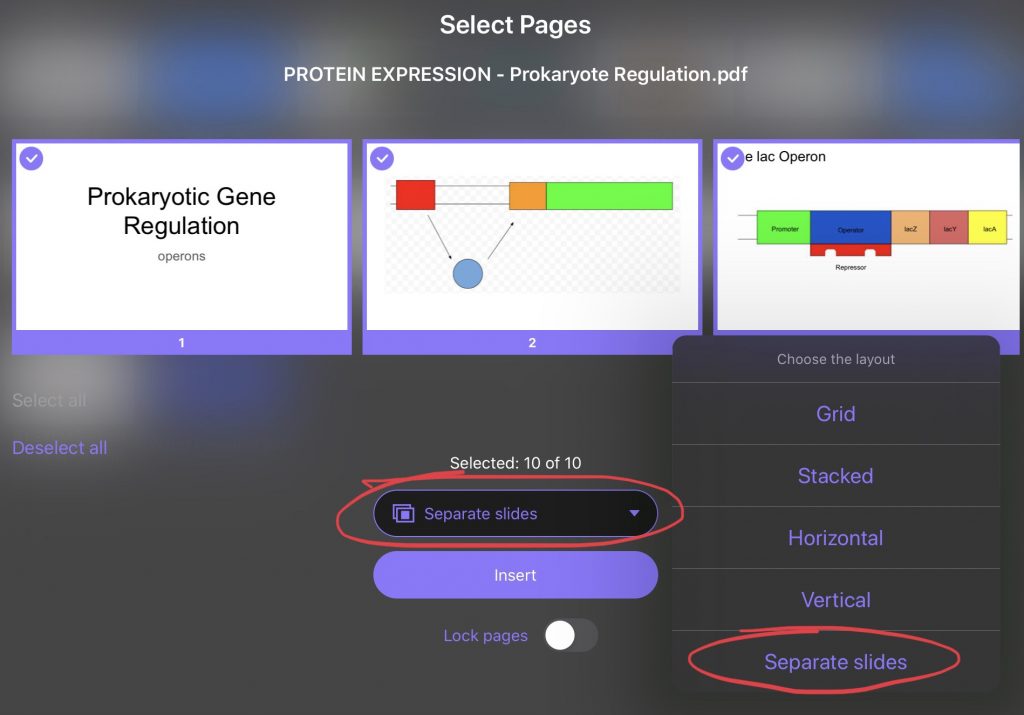
Choose the slides you want in your project and set the import method to Separate Slides. When you’re ready, tap on Insert.
Show What You Know
Once the slides are imported, students have a templated layout they can use for their responses, taking the stress of layout and organization off their shoulders.
Do you have other Explain Edu tips, questions, or ideas? Leave a comment!