Jamboard is a collaborative whiteboard tool within your Google account. All students in the district have access at this point and in this post, we’re going to share three ways to work with Jamboards with your students.
It’s important to note before we dive in that the toolset in Jamboard on the iPad is different than what’s available on your laptop. Take some time to use Jamboard on your iPad so you can take advantage of some of the options students have access to.
Before you Start, Plan!
Jamboards are great on-the-fly whiteboards, but it takes some planning to really make them effective tools for collaboration with students. Take some time to think through what you want students to do and create your board first. This will help you not only get used to the tools, but also make critical decisions about instruction.
If you need a boost in how to get started, Holly has curated a few starting places with Jamboard templates you can copy!
Bonus: Assistive Tools
This one is so good, it’s a bonus at the top of the post instead of at the bottom. That way, you see it first, even if you don’t read the rest of the article.
Free drawing in Jamboard is a great way to model annotation or to work some simple examples in a whiteboard. The drawing tools can be more accessible than a keyboard, which helps ensure that every student can engage. To broaden the accessibility, Jamboards include Assistive Drawing Tools which help poor artists like myself as well as participants with reduced mobility or motor control. You can choose between text, shapes, or free drawings and the app will attempt to find a match to insert.
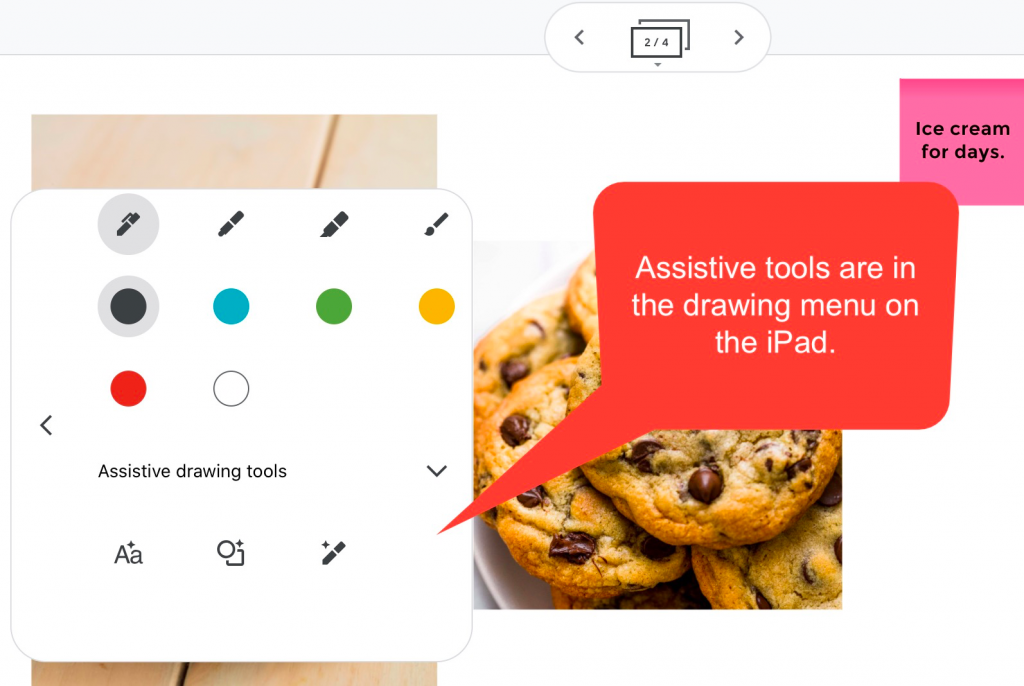
A practical example would be a handwriting task, but a student’s writing is very difficult to read on the iPad. Instead of laboring to read, allow the student to use the Assistive Text option to write as best they can and have the app make it more legible.
It’s important to remember to score students on what they know and can demonstrate and to remove any possible barrier to that demonstration. The assistive tools in Jamboard make that easier for a wider group of people at all levels.
1. Formative Checks
Jamboards can be a great way to do quick formative checks with students. Throw some decision-making tasks out either verbally or in the chat if you’re online. Students can then draw a checkmark or add a sticker to make their decision.
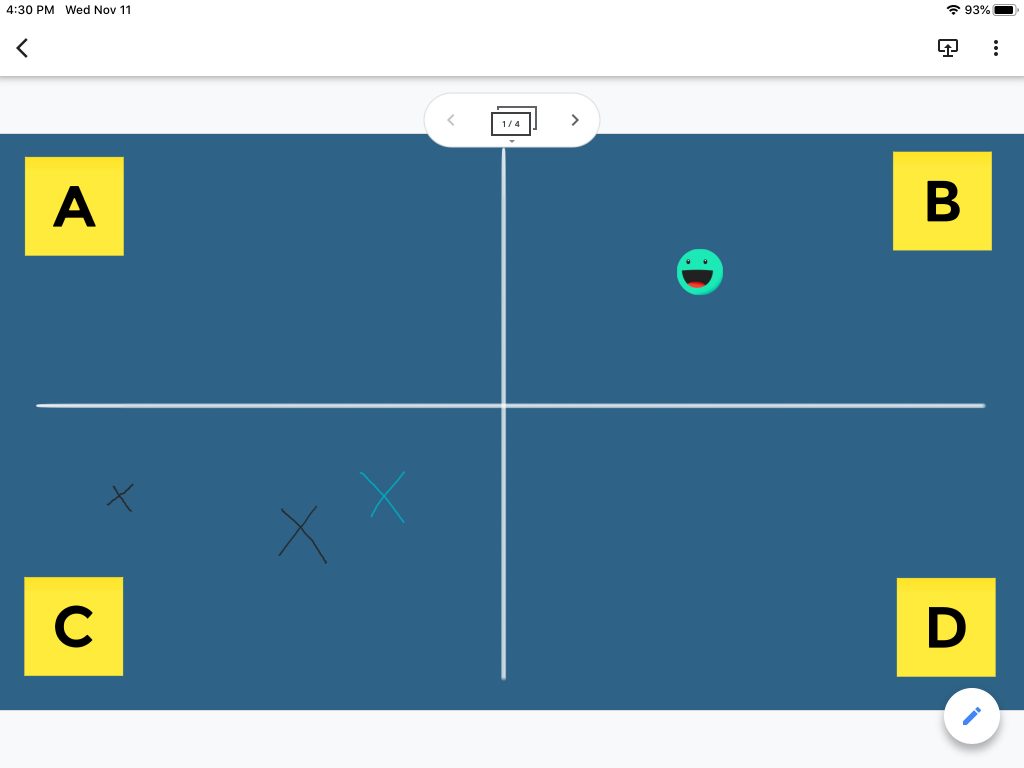
Use this feedback to drive discussion in your class. Have students argue for or against choices and then allow a second round of voting. Making an independent choice helps you see where students are in the moment. Then, you can draw out understanding and/or misconceptions in a discussion. Allow students to revise their answers based on what they hear from classmates. Your job is to listen thoughtfully and provide general feedback as they’re discussing ideas.
You only need one slide for this task! Be creative in how you design your layout. Encourage students to use emojis or other avatars instead of simple checkmarks to build that engagement opportunity.
2. Gathering Ideas

Jamboard can be used in a group brainstorm. You can add sticky notes or images to prompts collaboratively. This could be used to collect pieces of information about your class or to find representations of vocabulary terms. Image search is built right into the app to make it easy to find that perfect picture. Students can also upload photos from their camera roll to show what they’ve learned. You can then save the collage as an image to share back out as flashcards or for further review with the class later.
3. Social-Emotional Gauges
Verbal check ins can be difficult for students for a number of reasons. It’s important to recognize that we’re all feeling some level of added stress due to working and learning from home. Using Jamboards, students can give some general SEL feedback at the start or end of a lesson. As a teacher, it’s critical that you give your online students an outlet for this kind of feedback. Without asking, you aren’t able to effectively respond to their needs, as limited as your help can be given space and time differences.
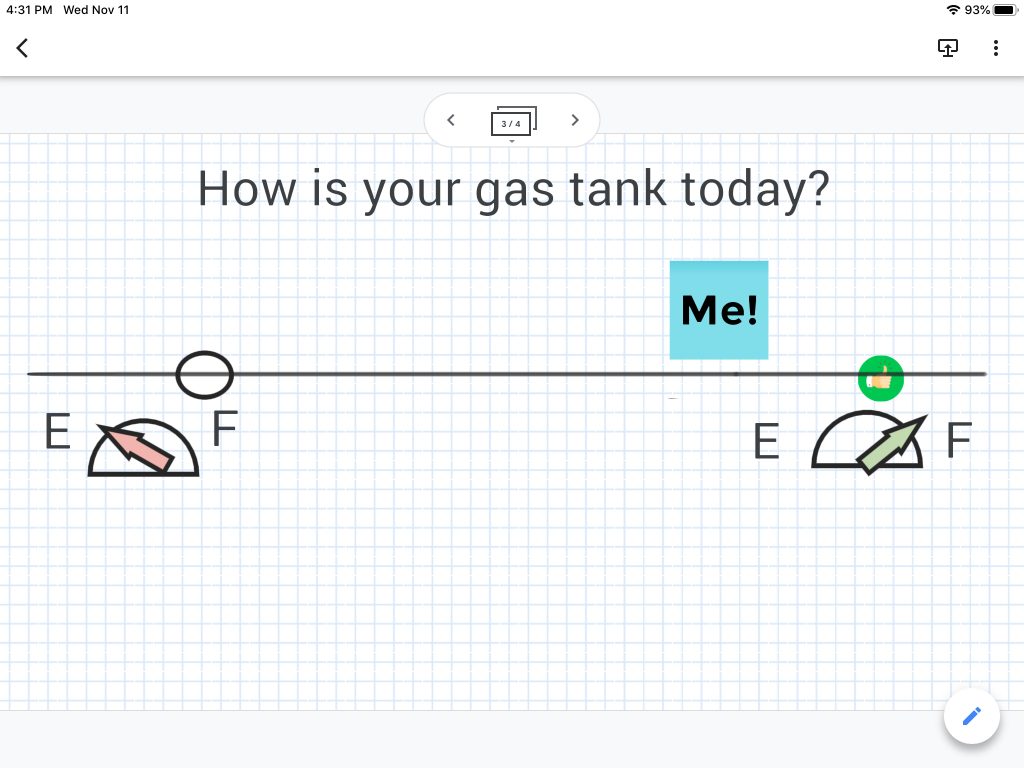
I’m a fan of the “gas gauge” question or the “traffic light” status. You could also take advantage of the emoji keyboard built into the iPad to ask for their general feeling. Seeing this kind of feedback helps you read the room whether your virtual or hybrid.
Final Thoughts
If you want to see some of these ideas in action, we have a video on our YouTube channel with full explanations you can listen to. The last recommendation is to do some playing on the iPad app because the toolset is different. You don’t want to miss something students could do because you don’t have the same tools in Chrome.
This is an easy way to build in some of the interaction we’re missing if you’re fully remote and to promote interaction in the hybrid classroom. Jamboards are not limited to online-only and each of these activities can be used in the hybrid classroom and even help unite your A/B day students in some activities together.
What ideas do you have? If you have templates or resources to share, leave a comment and we’ll get them out to others!