As the end of the year draws near, are you looking for a way to keep your students engaged and excited about doing their Seesaw activities? Or in some cases, even just get students to complete? Well look no further! The spotlight seek and search activity adds an extra element of fun for the students. It is easy to create and can be used for any subject! Here’s how to create one broken down step by step.
Creating your OWN spotlight Activities!
Go to “My library” within your activity library and then click on “create new activity”. On the next page, scroll down to where it says “add template for student responses”. When prompted to add a template, you will click on “drawing”.
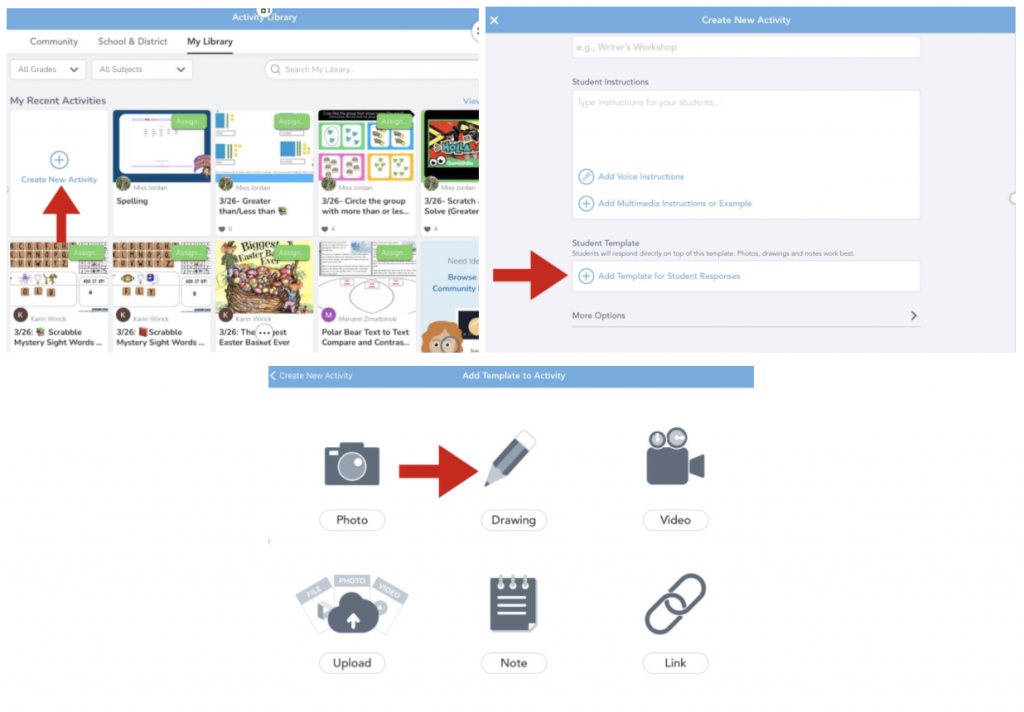
Next you will be uploading the background image that you will be using to “hide” the content your students will have to find. SeeSaw has yet to make a droplet tool to match colors, so you will want either a background with mostly the same color or a background with a variety of colors. There are a lot of good ones out there if you Google search “free colorful backgrounds”. To upload the image, you will click on the camera icon and then “upload”. If you are creating this on a computer, your files will be pulled up. If you’re creating it on an iPad, the camera roll will pull up. You will find the background that you want and will click either “select” (computer) or the green checkmark (iPad).

Once you have the background you want uploaded into the activity, you will want to size it and then lock it in place. You do this by clicking the three dots button > lock > lock all. This will prevent your students from moving it around.

Next you will want to pick the shape that the student will use to find the “hidden” text. To get there, you will click on the big 3 dots button on the left hand side of the page, then click “shapes” and click on the one you want. I personally like to use the circle or the star.
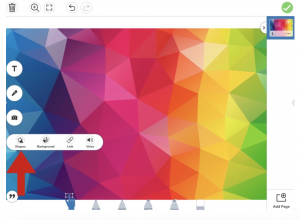
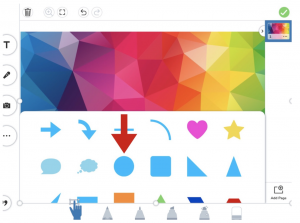
You can change the color of the shape if you want by using the color slider on the right hand side of the page. You will also want to lock the size of the shape to keep students from enlarging it and finding all the “hidden” text at the same time. To do this, click on the 3 dots > lock > lock size. Thank you Seesaw for this great new feature!

Now you’ll add your text! You do this by clicking on the “T” and typing in whatever it is that you want hidden. From there, you can change the style of the font by pushing the three dots again and going to “style”. Once you have the style you want, you can resize the content and move it. To “hide” the text, you click on it and then use the color slider on the far right hand side until it disappears in the background.

After the text is in place and “hidden” click on the 3 dots > lock > lock size to keep students from enlarging it. If you don’t plan to have students move the text out of the background, you can fully lock it.

Repeat steps 9-11 until you have all the text you need hidden.
Click on the shape and move it around to make sure you can see all of your text. Then put the shape on the side of the background so it is not revealing any of the text you want hidden! *Hint – if your words are not revealing, that means your shape is on the TOP of your page. To make this work, you need your text boxes on top. You can move these text boxes forward by selecting Order > Move to top.

When you’re finished, push the green checkmark. Then fill out the rest of the information and hit the blue save button on the bottom right hand side of the page. And that’s it! Your students are ready to engage and explore!
Accessibility
Be sure to add any voice recordings that will help ensure this lesson is accessible to all of your learners. It is important to note that if you add an audio recording to a hidden word, the audio icon will always be visible. While the audio recording helps with accessibility, it does take away the “surprise” and fun elements of this activity.

Examples
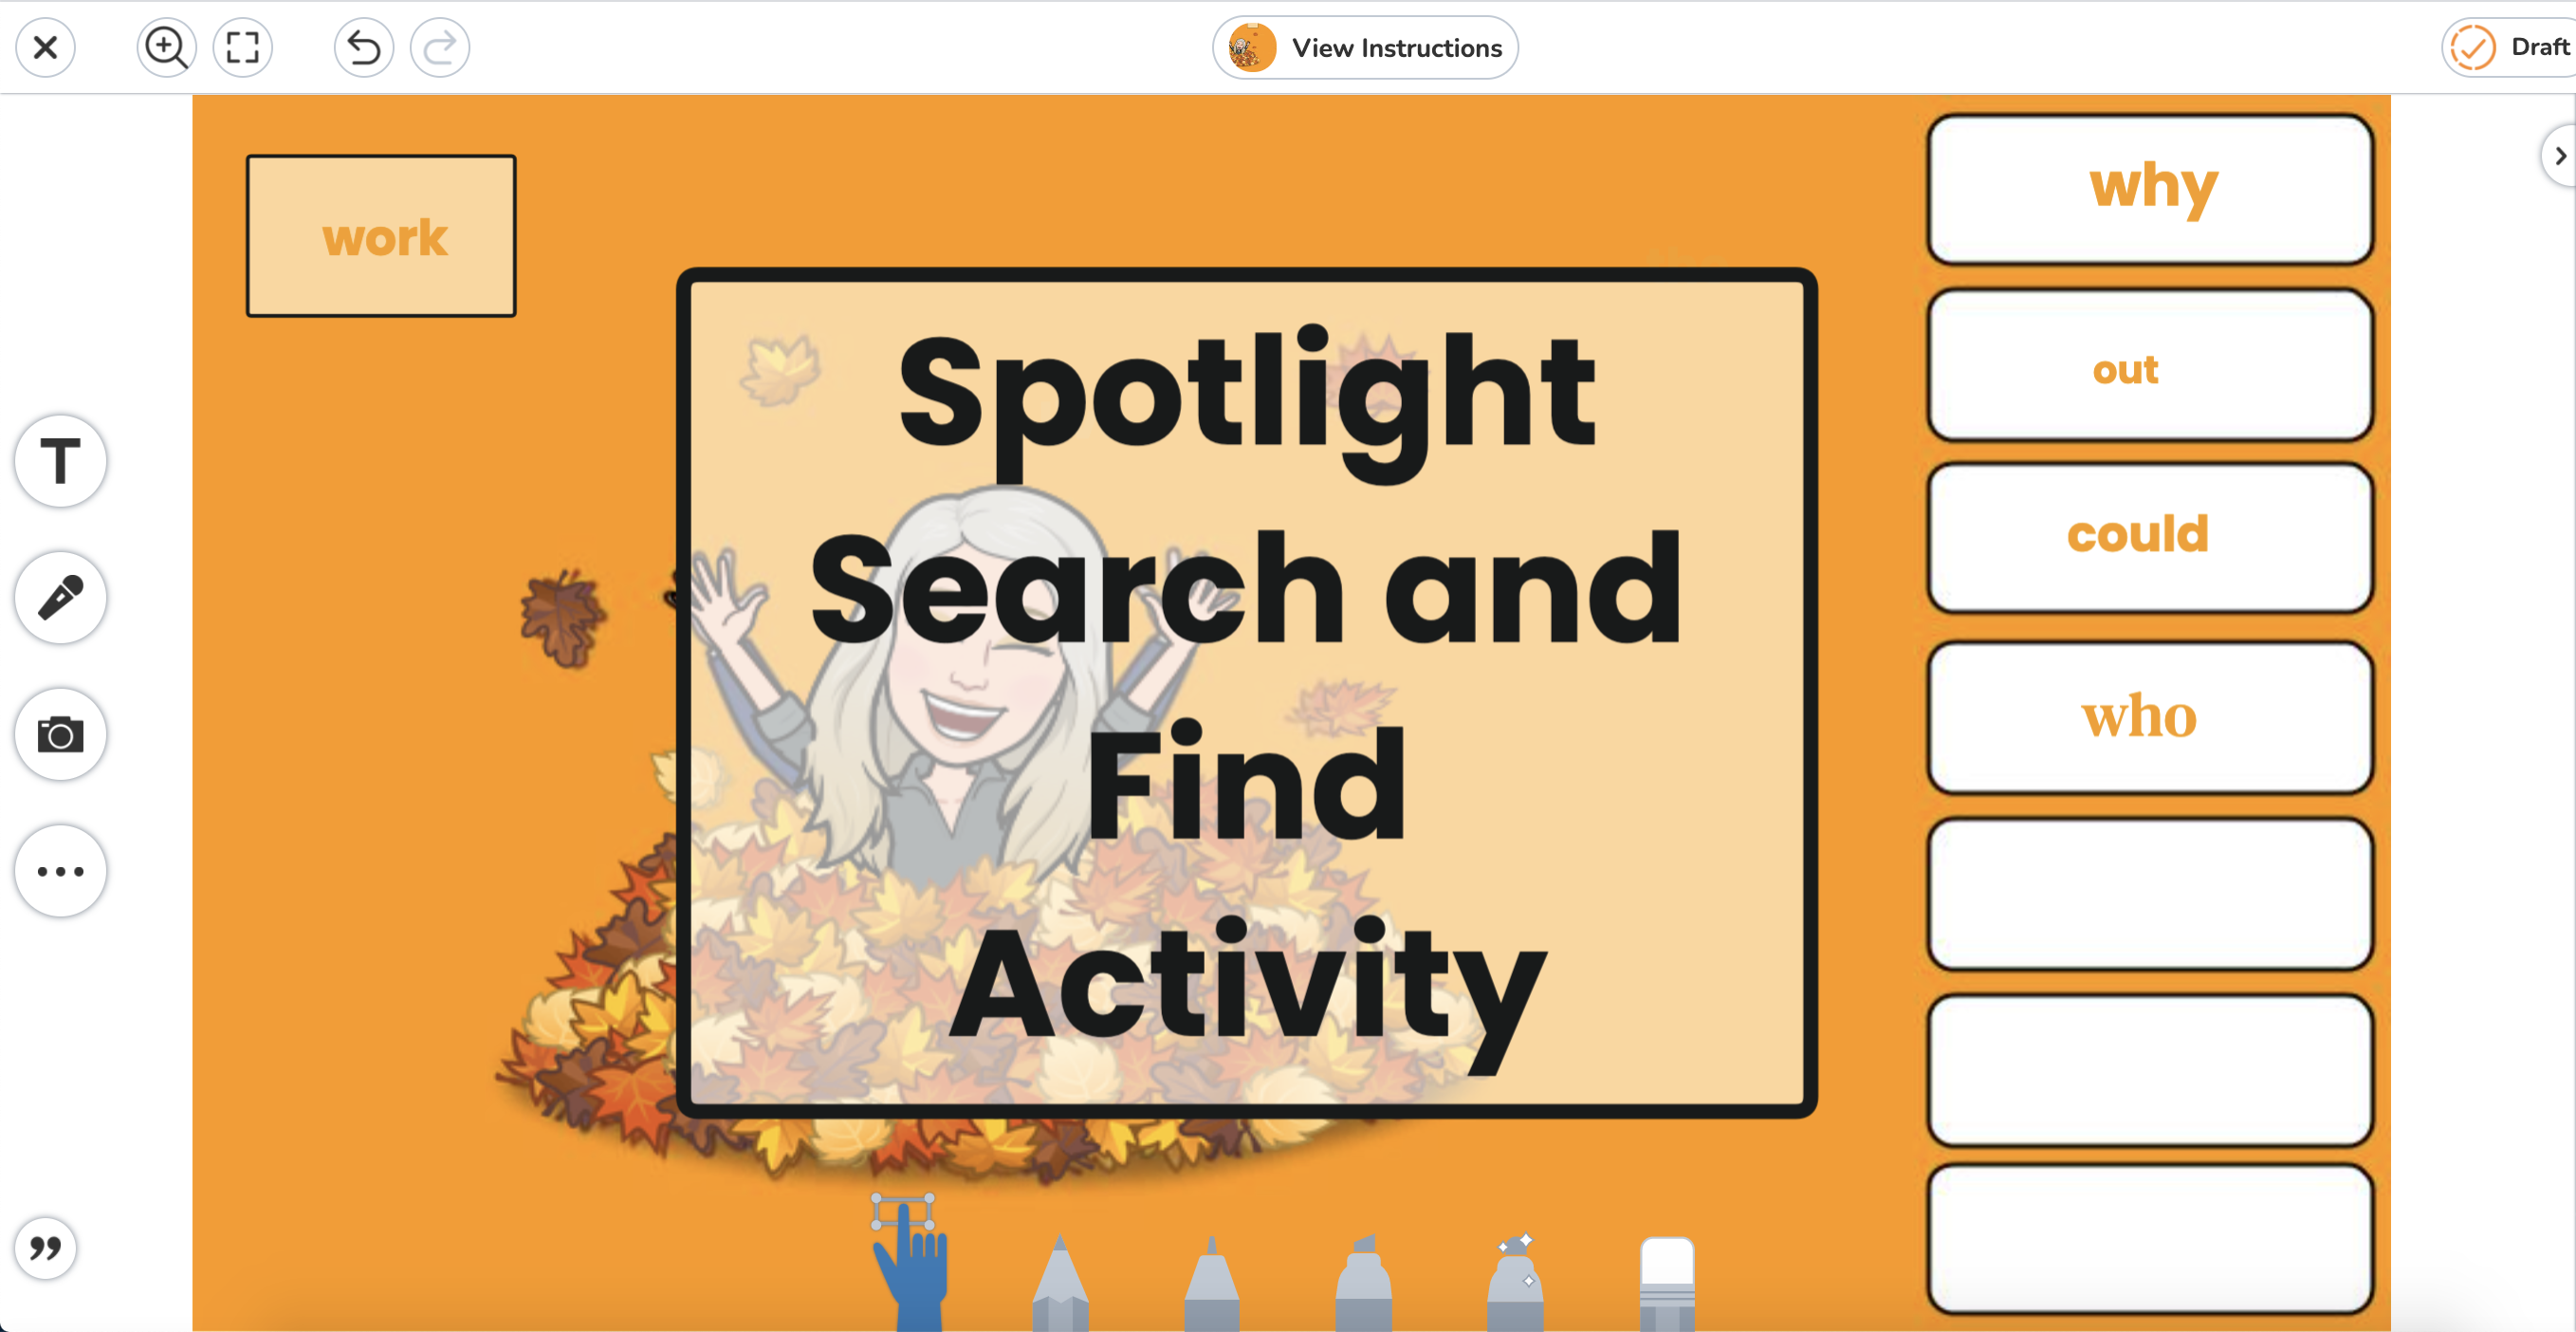
Here’s a link to a first grade example that you can use or modify about ordering numbers!
There is also a 3rd/4th/5th grade math example here where students locate their own problems to solve.
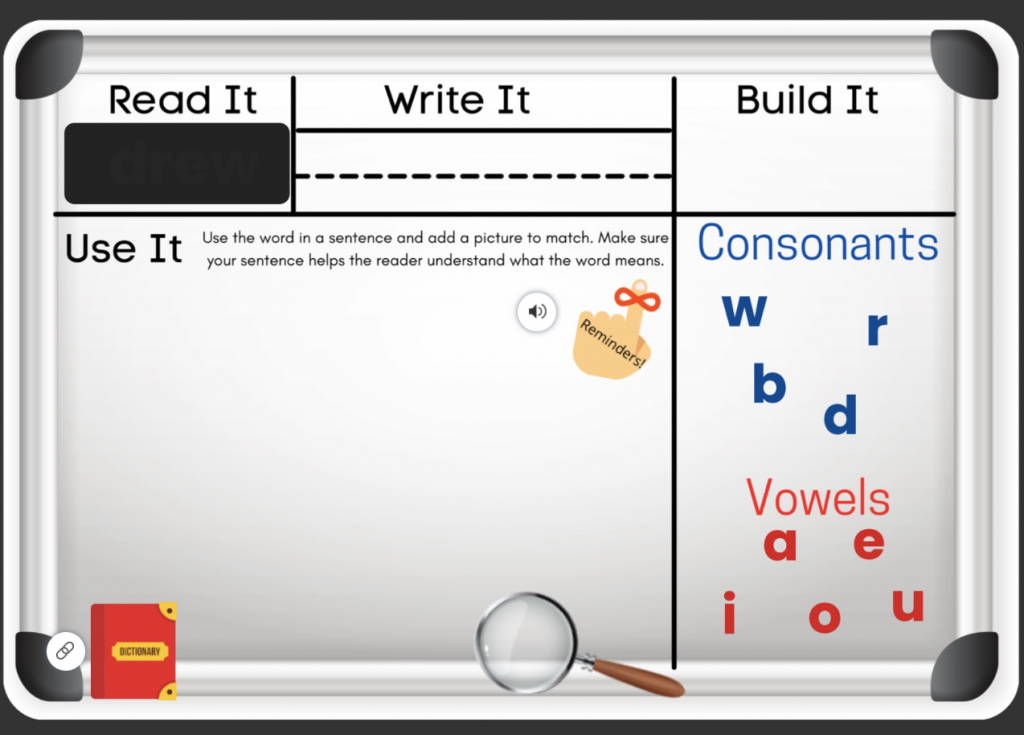
Below is a 2nd grade example using this strategy as just part of an assignment. In this activity, you can use the magnifying glass to uncover the hidden word under the phrase “Read It”.