What I truly love about Apple and the iPad is their dedication to accessibility. (You can learn more, here). Below I present to you my top 5 iPad accessibility tips for the iPad!
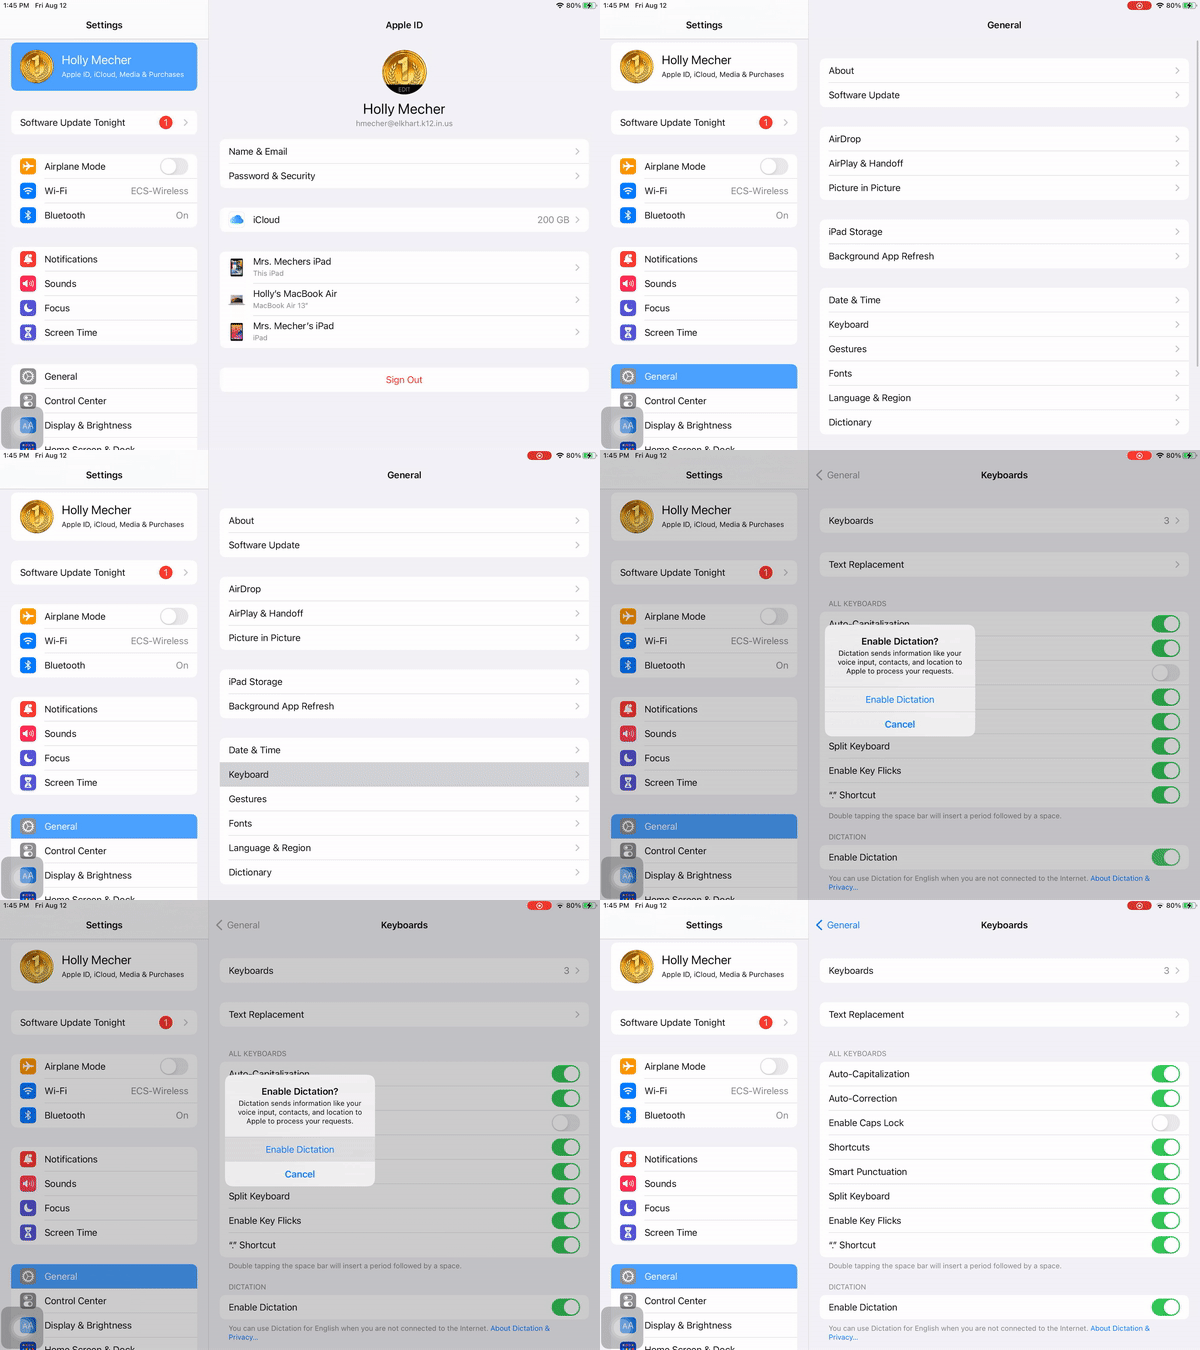
Tip #1: Enable dictation (it isn’t cheating)
Dictation allows students to use the microphone to use their voice to type. This is POWERFUL for many students, and while it may feel a bit like cheating, I promise you that it isn’t.
To turn on dictation, Settings > Keyboards > Enable dictation towards the bottom.
Tip #2: Speak Screen and Speak Selection (this also isn’t cheating)
Speak Selection allows students to have highlighted text read aloud. This is great for challenging texts within a student’s reading comprehension level or for students that may struggle to decode new words.
To turn on speak selection, Settings > Accessibility > Spoken Content nested under vision > toggle on Speak Selection
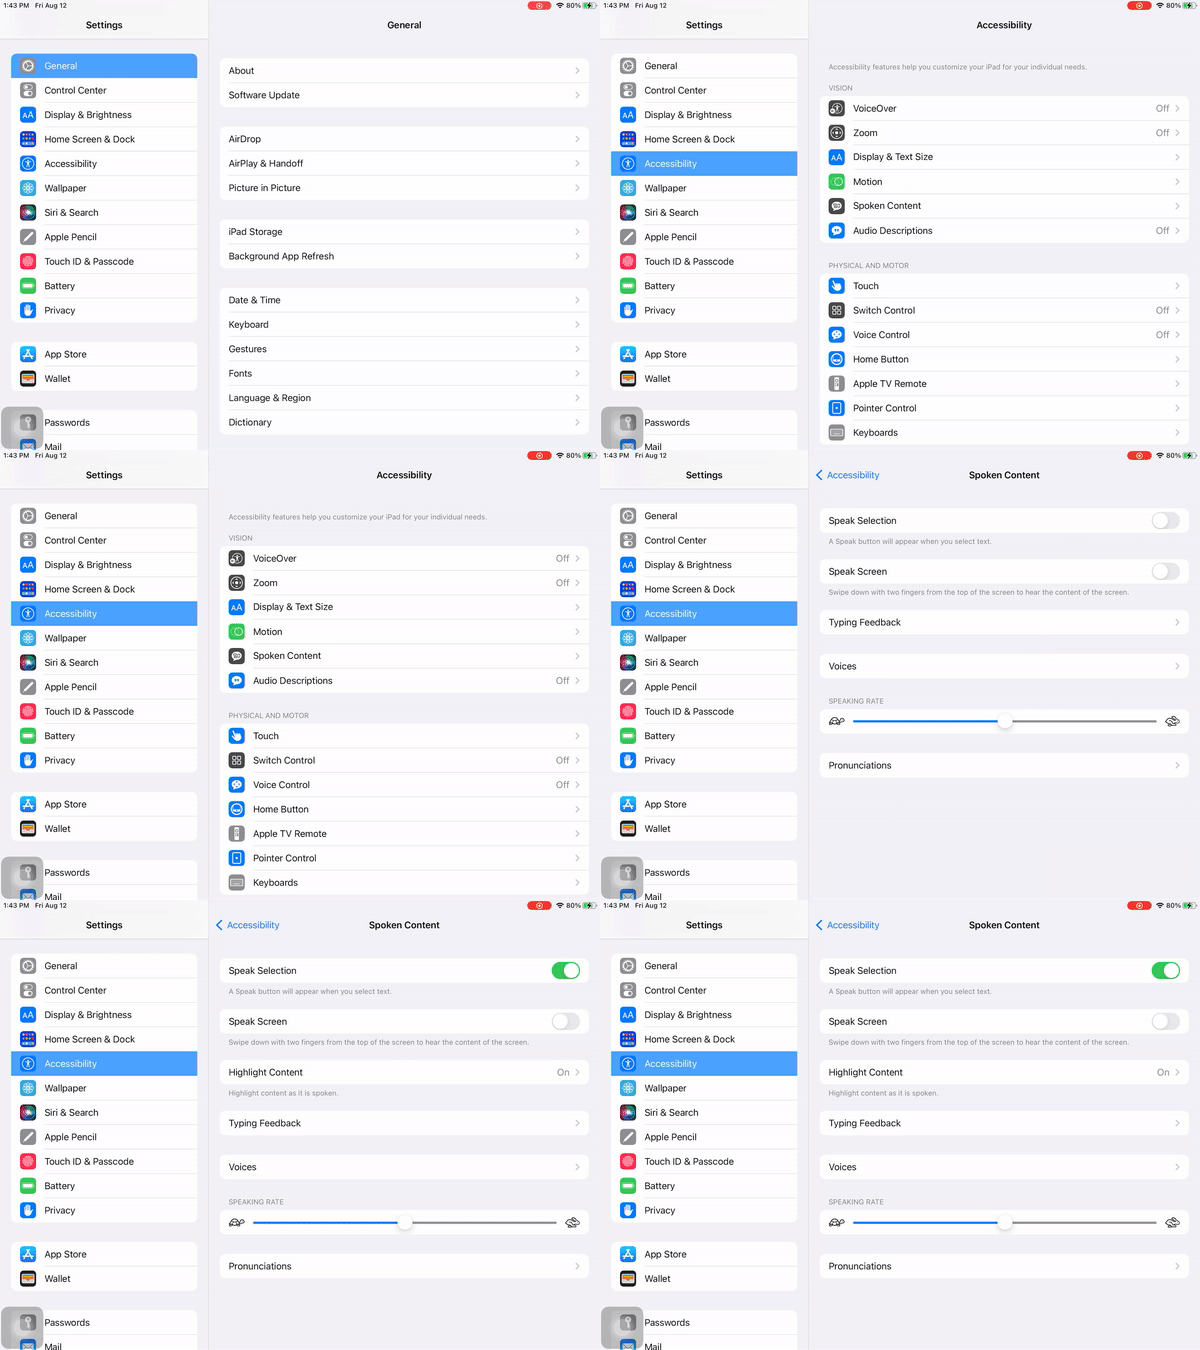
Speak Screen allows entire pages to be read aloud. This is especially helpful when a text is above a student’s reading comprehension level, but not above their listening comprehension levels.
To turn on speak screen, Settings > Accessibility > Spoken Content nested under vision > toggle on Speak Screen
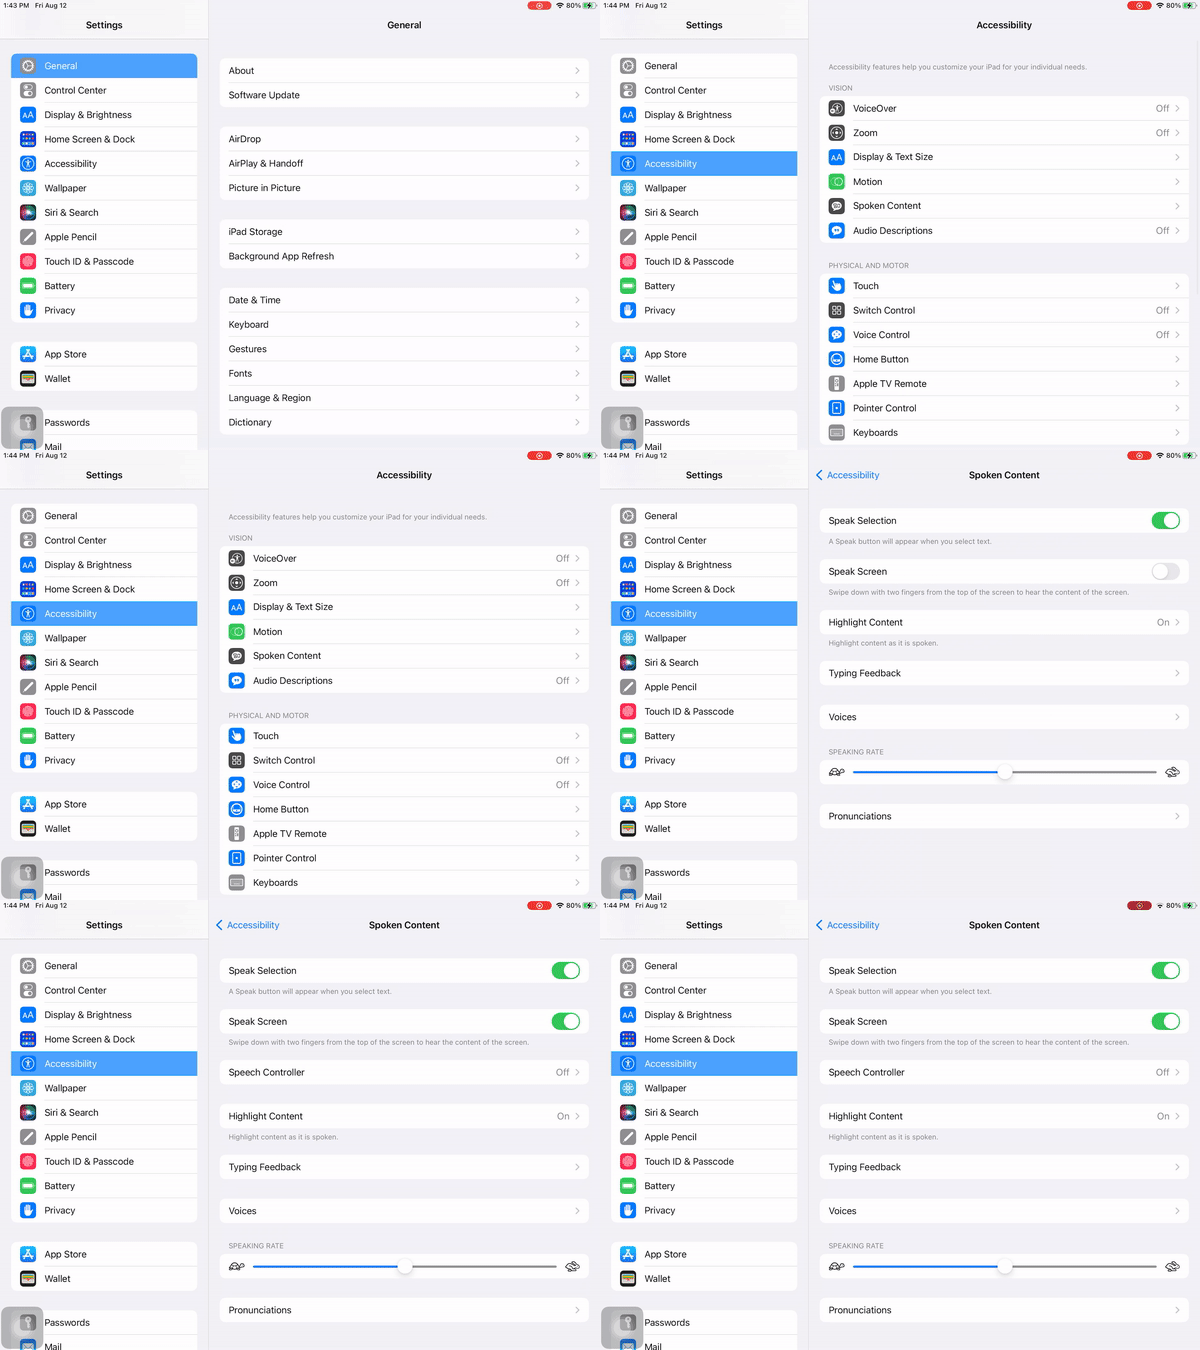
To use speak screen, use a two finger pull down swipe from the top middle of the ipad. A toolbar will appear. Use said toolbar to control speak screen. Push the small arrow on the left to minimize. Push the arrow again, to bring the menu back.
Tip #3: Use the Alex Voice
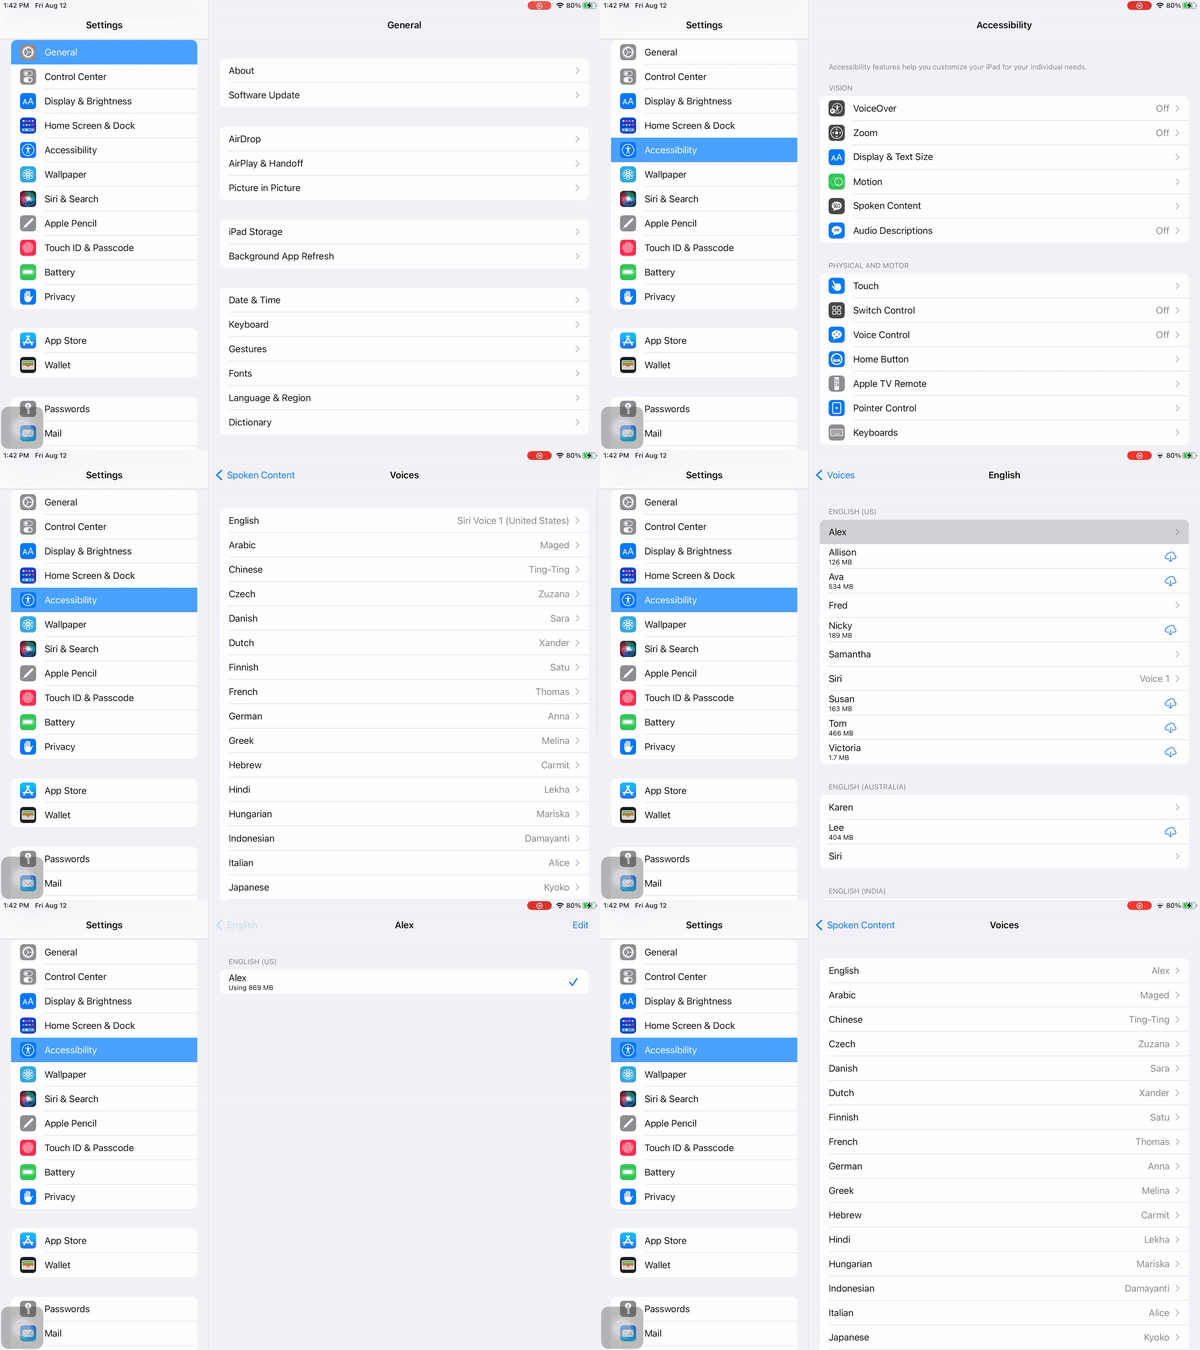
The Alex voice is a specific voice that can be used by the iPad. Alex is a voice that you can use for your iPad for any spoken content. This voice reads ahead for context and can tell the difference between abbreviations like doctor (dr.) and drive (dr.), for example.
To download the Alex Voice, Settings > Accessibility > Spoken Content > Voices > Alex
Tip #4: Safari Reader view to eliminate distractions
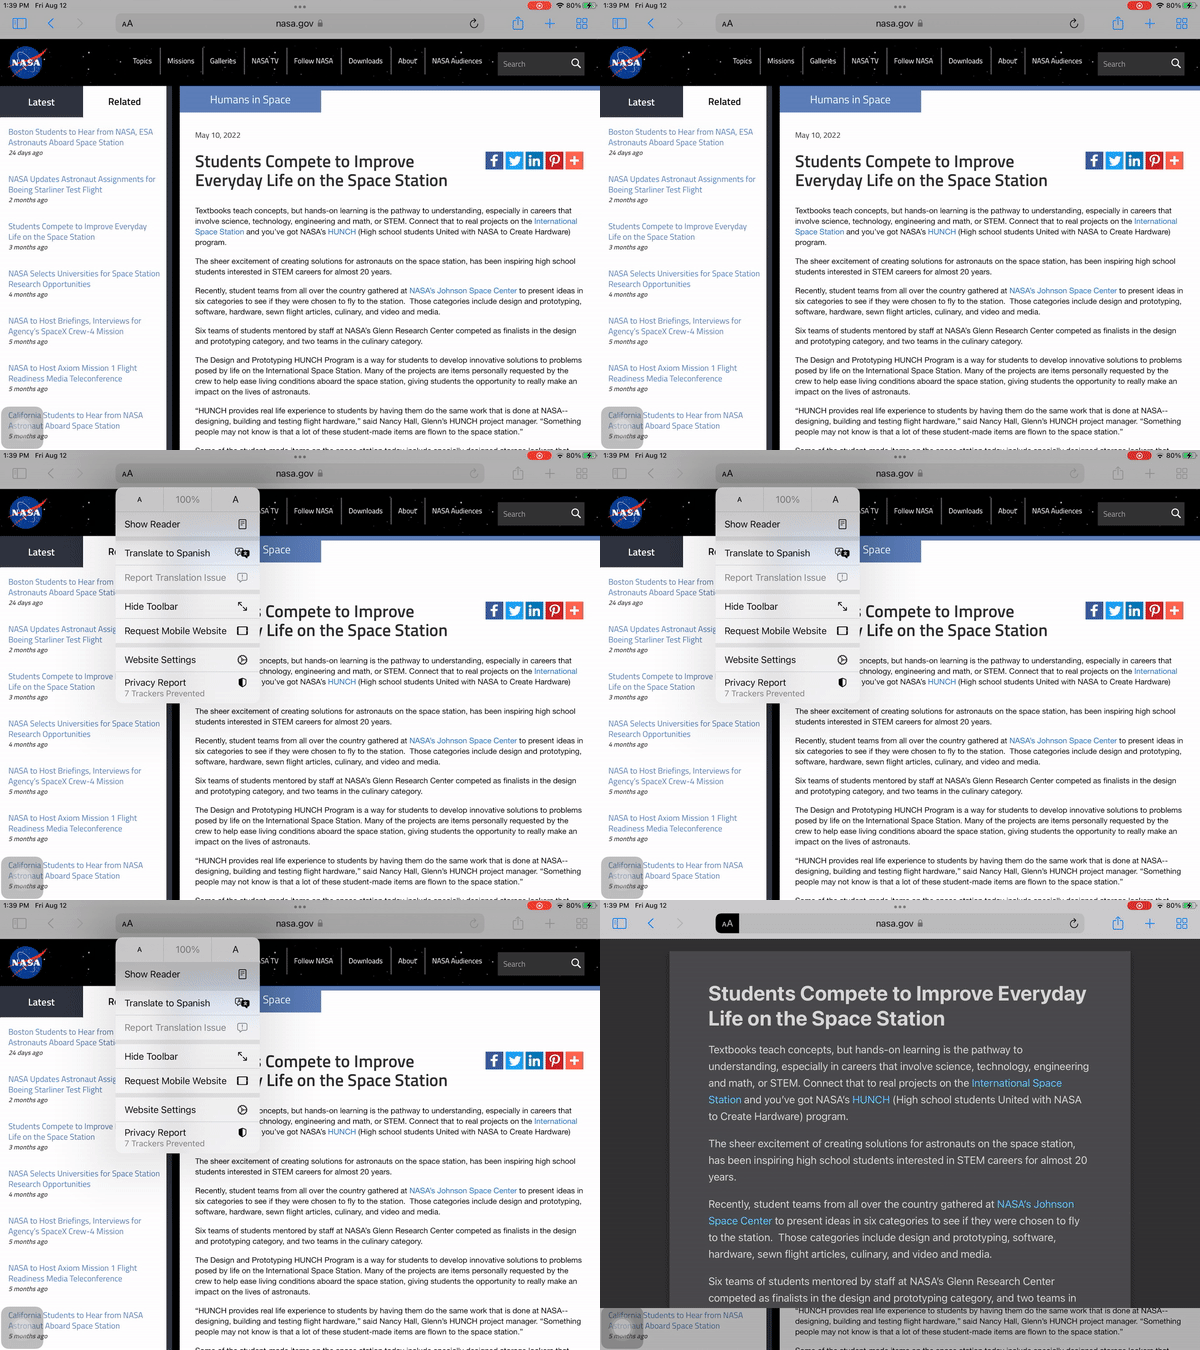
Have you ever tried to use safari with your class, but students easily become frustrated or distracted by all the links, headings, and online text features? Safari Reader is a way to eliminate distractions when using Safari.
To use Safari Reader, select the aA button in the URL bar. Select ‘Show Reader’.
Markup your page by selecting the share button, and select “Markup”. Learn more about annotating from Safari Reader, here!
Tip #5: Guided Access to help focus (not to punish)
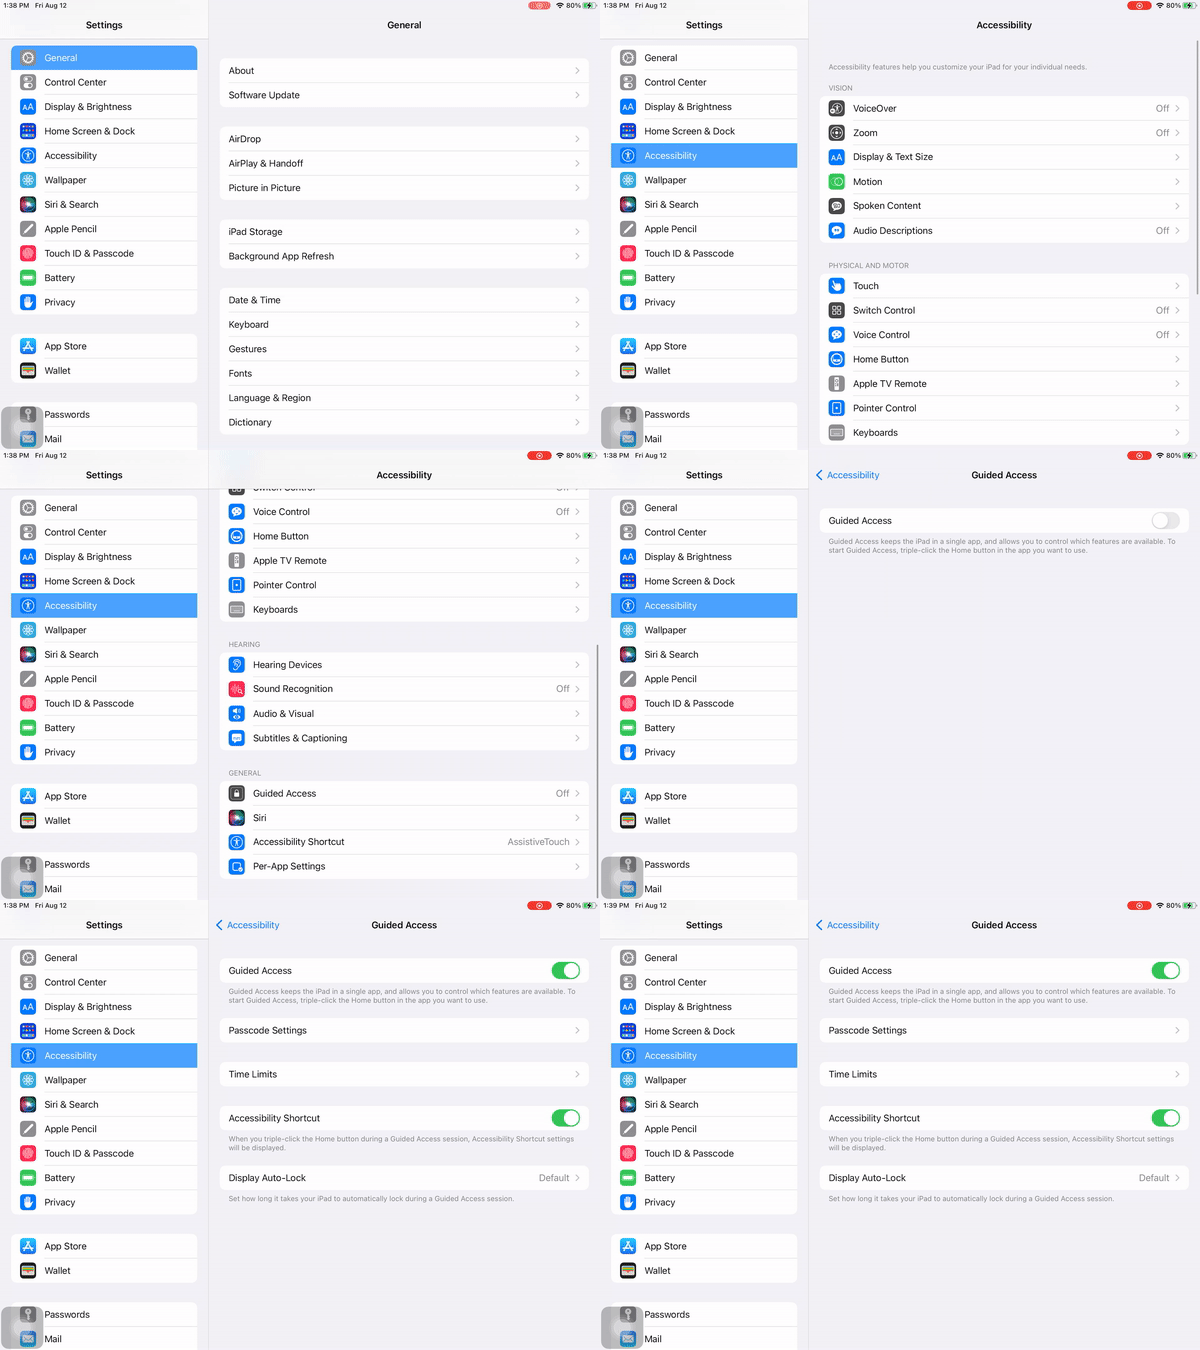
Guided access is a tool that keeps the iPad in a single app, and allows you to control which features are available.
Heed my advice, refrain from getting into a power struggle over the iPad, and don’t use guided access to punish or control. Instead, use Guided Access as a tool before an issue.
Imagine how these two scenarios will play out:
Situation 1: “Johnnie, I notice that the past few days you’ve been struggling on the iPad with focus. How about we turn on Guided Access for 10 minutes to see if that can help you focus. When guided access turns off, you can spend 2 minutes working on that drawing that you’ve really been enjoying. Then when your two minutes are over, we can turn guided access back on and try again!”
Situation 2: “Johnnie, you’re off task again! I’m locking you in. Now you can’t get off task. Do your work”.
Do not invite students into a power struggle. Help students focus on the iPad before the distractions become a problem.
Not much of a reader? Need to see it in action? Watch the video below!
Honorable Mention: Snap and Read
Snap&Read is the tool you need to help kids read. Learn more by watching the video below.
