
While students are away we want to give them a sense of normalcy and routine where it make sense. Having a way for students and parents to hear and see their teacher is a great way to build lasting relationships and create more engaging and authentic learning experience. There are many different ways of using videos with your students while they are away. No matter what type of video you choose to make, remember to keep them short. Below are suggestions for ways to create and share different types of videos.
Seesaw Recordings (elementary)
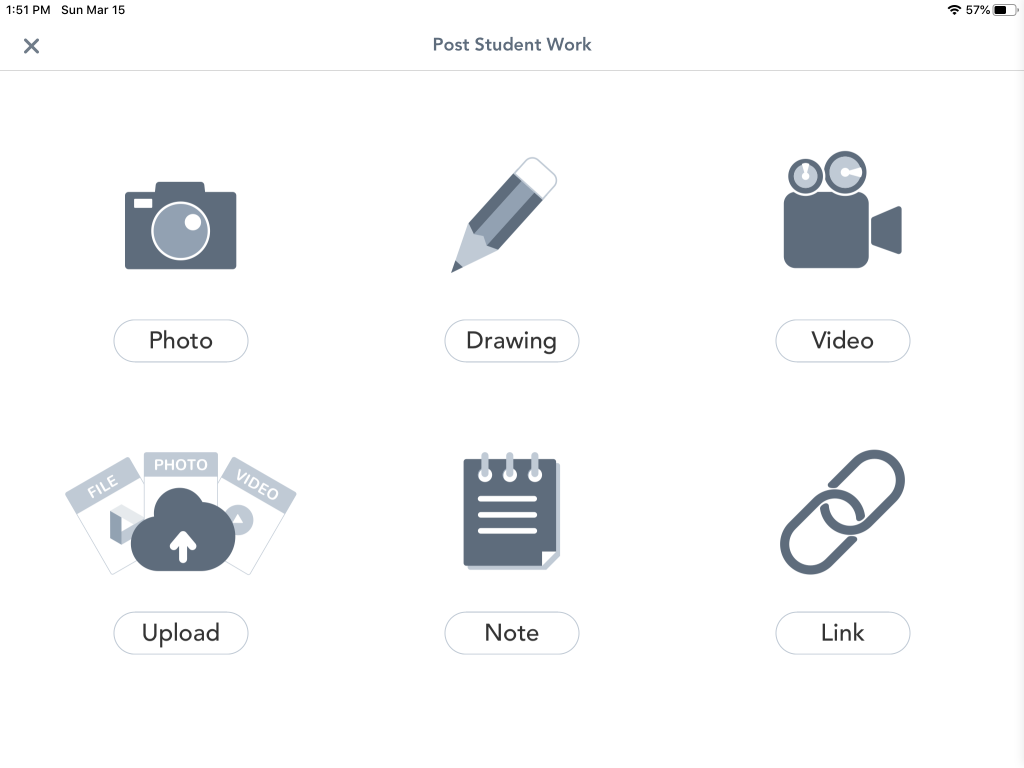
Seesaw has a built in recorder that you can use to make all kinds of videos. To use it, create a new post or activity for your students and choose the Video tool.
Explain Edu (secondary)
Canvas doesn’t have a built in video recorder for teachers (it does have a handy recorder for students, though). Explain Edu is an app available in Self Service you can use to record simple whiteboard-style videos for your students. Start with a blank canvas and use different tools to add photos, text, and even draw on the page. When you’re done, export to your Photos and then upload to YouTube or Google Drive.
Ideas for Getting Started
Read aloud
Students of all ages love being read to. It’s relaxing and it gives them time to see your face and hear your voice. Set up a chair or stand to hold your iPad near your reading corner in your classroom or set up a reading/teaching space in your home. You can even record with the Camera app and then post to your class.
Screen Recording
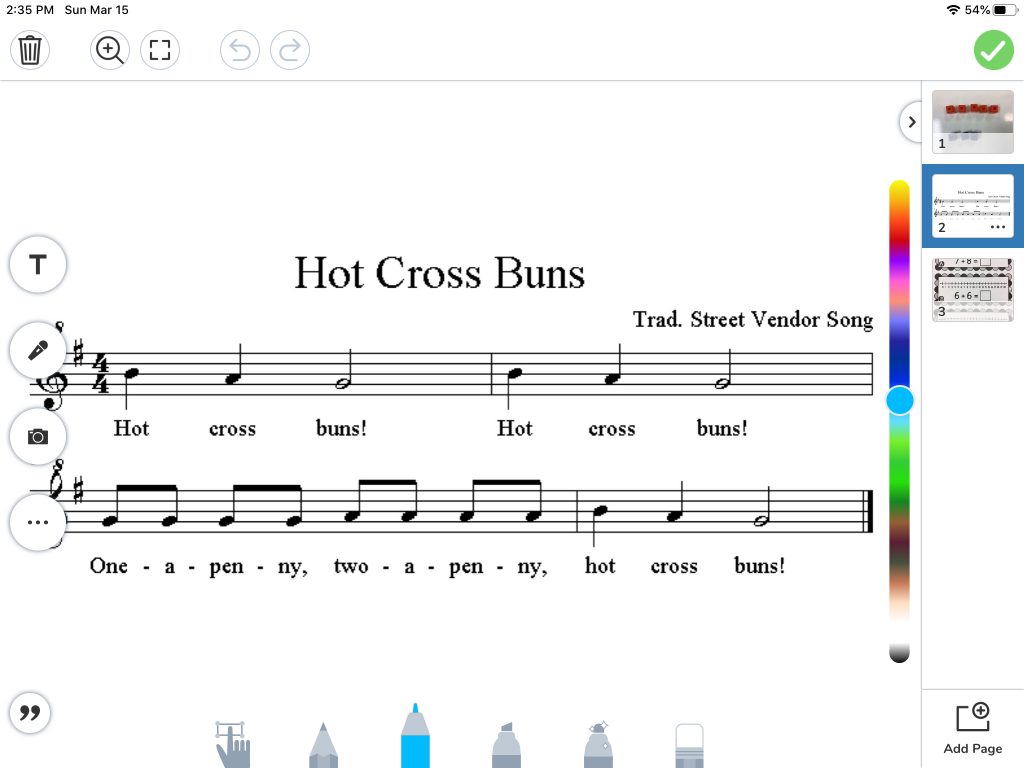
In Seesaw, you can use the drawing, upload, or photo tool to record yourself talking and marking up multi-page images or documents in Seesaw. Once the material is loaded into an activity, teachers can select the microphone button on the right in order to record a mini lesson for their students and provide an example of the work they would like to see.
In Explain Edu, you can do the same using multiple slides in your video. Set up your pages ahead of time with images or text and then annotate with the pen tool while you’re teaching.
Teachers can also make a screen recording of anything that they do on their iPad in any app to share with students. We have a short video (also embedded below) on using the built-in screen recorder to help you get started.
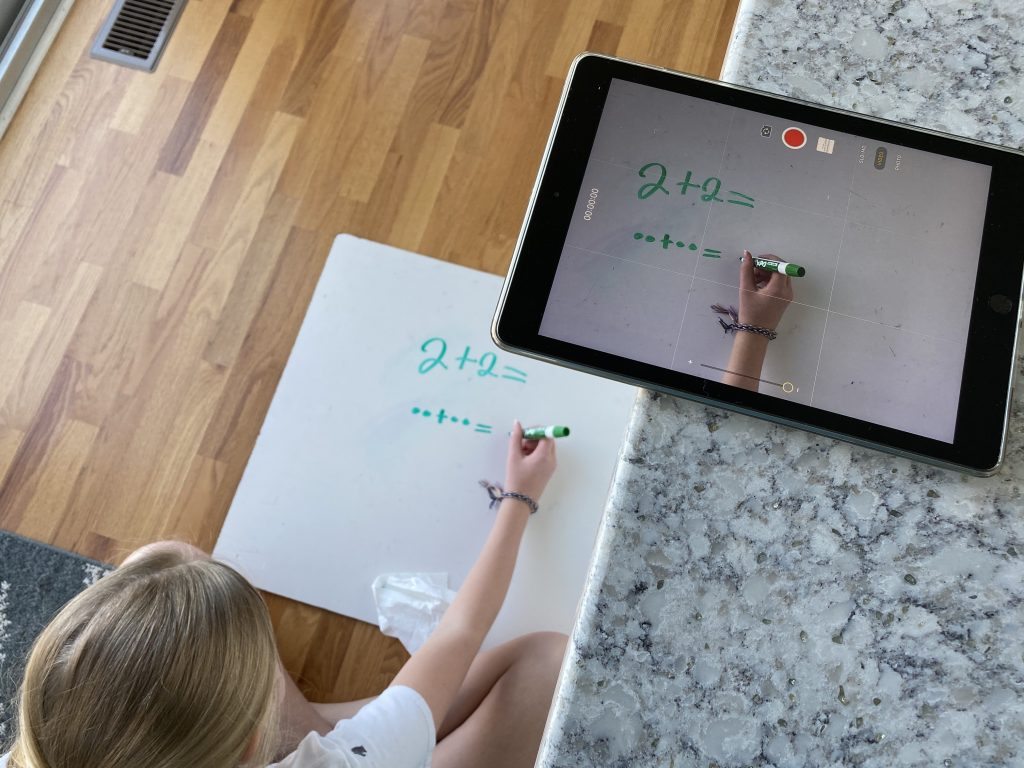
Whiteboard Video
This type of video captures the teachers hand and a writing surface such as paper or a whiteboard. Students can watch as the teacher writes or annotates.
No fancy equipment is needed here. Simply place a chair on top of a table, place your teacher iPad on the seat of the chair with the camera facing down. Place paper or a whiteboard on the table and begin recording. You can also place your iPad on a table and your writing surface on the floor like in the example below. Teachers can edit the video after they are done recording if they would like.
Check-In or Check-Out
Morning check-in or afternoon check-out is a simple and fun way to connect with your students and could mirror classroom circle time. Students could use one of the Seesaw tools to share something fun that they did, their feelings about elearning, questions that they have, etc. This gives students time to interact like they would in a normal school day.
Secondary students could make a quick vlog (video-log) update and post it to a Canvas discussion. You could also have them post a response to a Flipgrid topic so everyone can see all replies.
Another way to engage students in the morning and afternoon is to incorporate a riddle, trivia question or other fun type of question that you could then answer in the afternoon with another video. Teachers could then pick a “winner” if someone answered it correctly.
In Summary
The key to all of this is connecting with students, creating a sense of normalcy, and engaging students in meaningful ways. You do not need to recreate every minute of a normal school day. Focus on the moments that matter and have your students spend their time creating, learning, and reflecting.

Great ideas ! Thanks for your help!!
When creating an assignment, how can I add multiple photos and videos? I watched a tutorial that suggested using the journal feature but did not allow videos. Can I create something in iMovie and import it?
Here are steps to add multiple photos. https://help.seesaw.me/hc/en-us/articles/115004047626-How-do-I-add-multiple-photos-to-a-post-