There are a couple of different ways you can organize your classes in Seesaw. One is by utilizing the unique classes already created through your PowerSchool accounts like Math and Reading. The other way is to use folders inside of one class or you can use of combination of the two.
Once inside a class, Seesaw allows you to create folders for student work and activities. This is helpful for grouping student tutorials, anchor charts, or larger topic based materials. Teacher and student work can also be sorted into leveled activities for students based on reading or math level, English proficiency, or for interest. Think Google Drive Folders meets Seesaw activities. One important thing to note is that you cannot nest folders. You are limited to one level of folder organization so don’t go crazy with topics.
In this post, we’ll show you how to set up folders and share an activity to a folder so student responses are filed correctly when they submit.
Create your folders
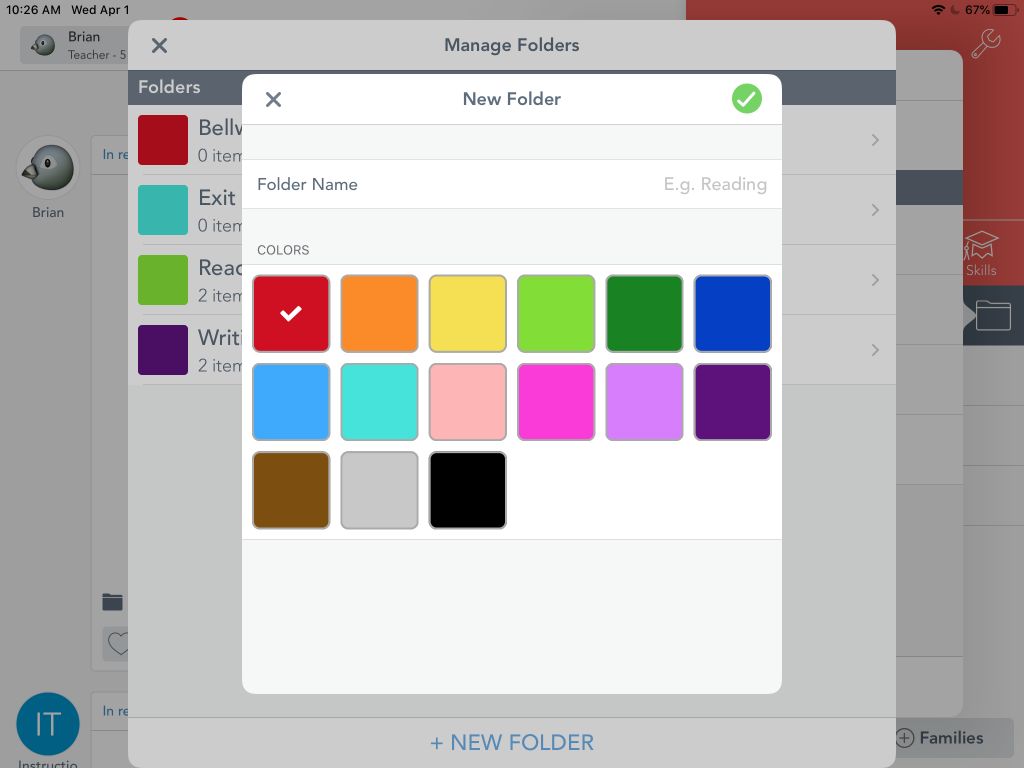
You can set up folders before you start by opening your class and tapping the folder icon next to the Class Journal title on the right side of the screen. Tap on Manage Folders and then tap on +New Folder at the bottom of the screen. Give your folder a title and set the color.
Add an Activity to the Folder
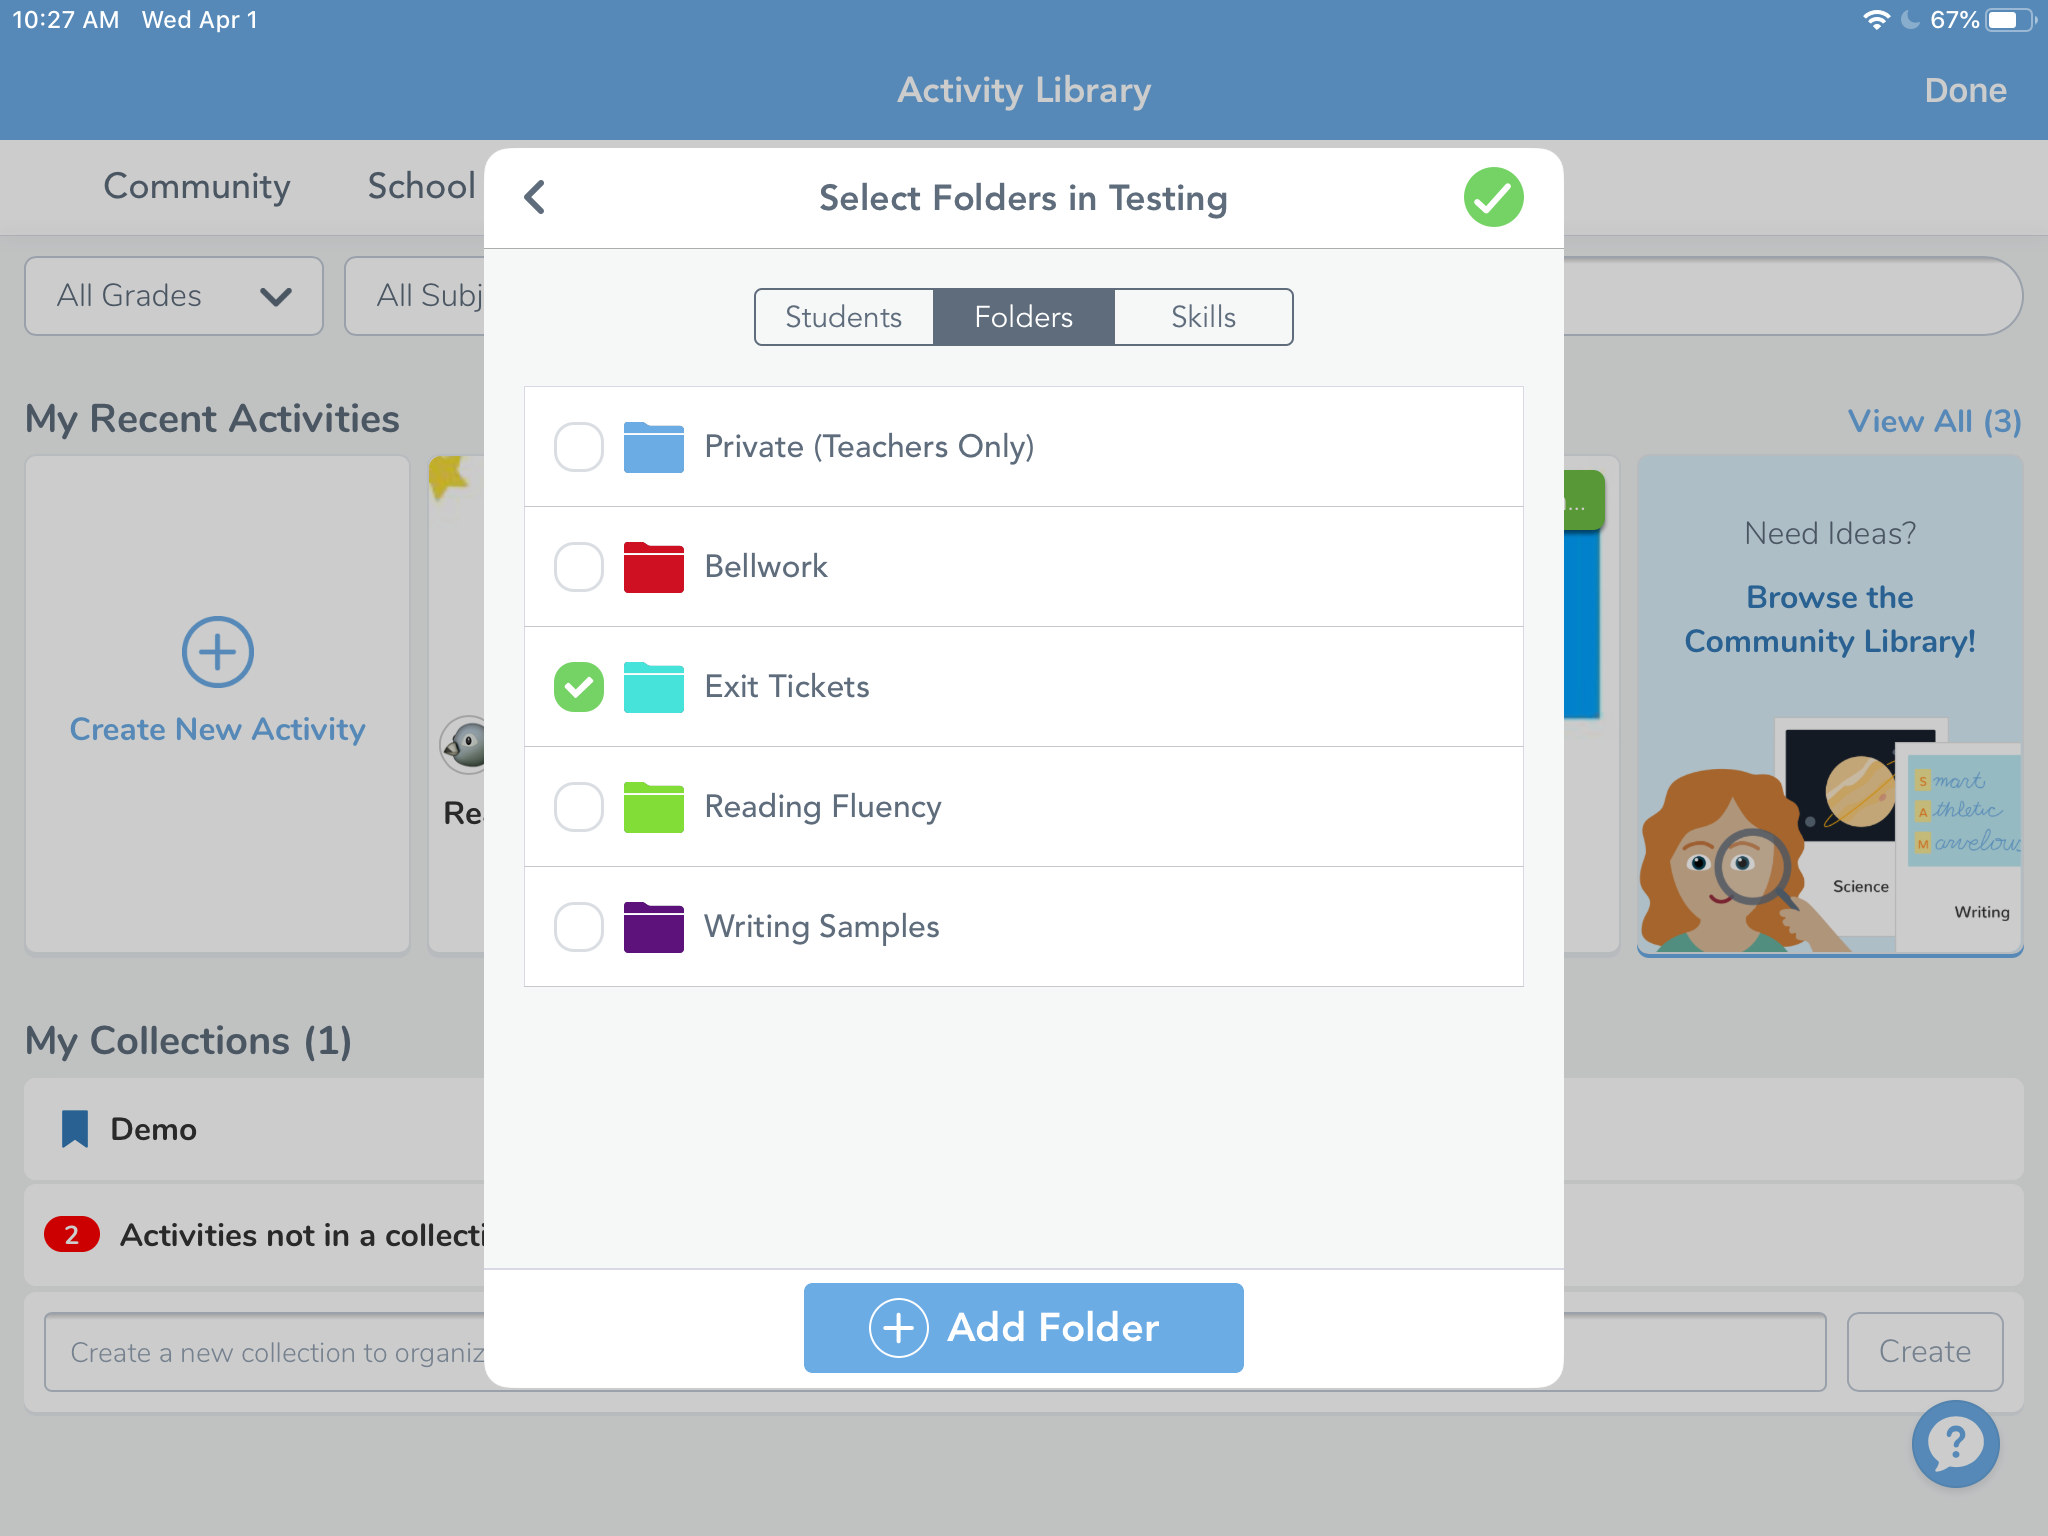
Now that you have at least one folder created, you can send an activity and have student responses filed directly to that location. Start by tapping Add and then select Assign Activity like you normally would. Browse the library to find the Activity you want (or create a new one) and then tap on Assign. Select the class and then tap on Edit Students, Folders, Skills.
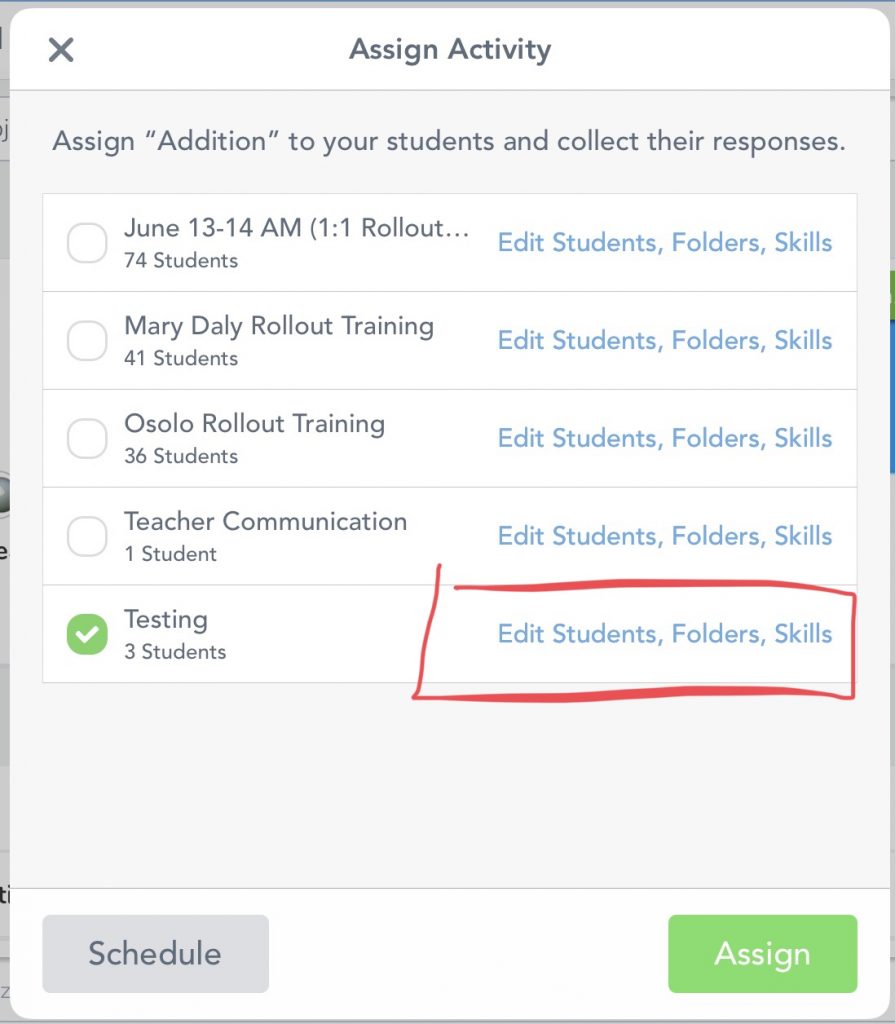
Move to the Folders tab and select the Folder you want the Activity to submit under (Note: You will not see a student’s activity in this folder until after they submit it). Activities can be filed in multiple locations! When you’re done, tap on the green checkmark and then tap Assign to send it to the class.

Student Responses
Students will see the Activity assigned just like normal in their activity tab. They will also see that the Activity will be placed in a specific folder at the bottom of the activity near the comment and like section. At this point, you won’t see anything in the folder if you open it. As student work is approved, their responses will be filed into the folder you chose when setting up the Activity. Students will also be able to go into each folder to see the work they submit.
As a teacher you can change your class settings to allow students to be able to move items into folders on their own if you go to the “Show add to folder step” found in the wrench in the upper right hand corner of your class.
Watch the Video
This is a lot to absorb, so we’ve created a video on how to do all of this from the teacher and student view. Take a look below.
Have more questions or other ideas about how to use folders? Leave us a comment!
How would I have a student’s activity sent to my folder that has already been posted? Another words stuff that I have already out there before I learned this new technique.
There’s no way to move everything all at once. You can click on the folder icon and select the correct folder for each response. The only way to have students move their own work is to enable item editing in your settings, but that opens up other issues with tagging other students and allowing for potential abuse.
Your best option might be to move forward from this point using folders rather than trying to back through every response to catalog.
Thank you, can I put the activities by dates or importance, that is, I want to place the math place value activity first to see when they open the program?
I was never shown how to put activities into a folder. I found this video on my own. My question is, Should I go back a sort each assigned activity into a folder? It took me almost a day just to do the month of November……I would have to do from Sept. 8 to Oct. 30th. Also, I am struggling to keep track of what assignments have been completed by which kids. What is the easiest way to do this?
Thank you for your help. Our admin left us to figure this our on our own WHILE we are implementing it…….
As far as going back, that’s up to you…but it sounds like a significant investment that, at this point, might not help you much moving forward. We prefer folders to the class stream for organization, definitely. If you’re assigning in one folder (or two, etc) daily, you know which ones to check back on rather than scrolling endlessly through the class journal. Students can also organize materials into a “turn in” folder that could help, but we don’t have anyone doing that specifically. Glad this was helpful!
Is there a way to create a ‘private’ folder (a kind of portfolio) for each student, that can be seen by students & parents?
When you open Seesaw for parents, they have access to all student work, regardless of whether or not it is organized into a folder. Students could (potentially) create their own portfolio folder to collect work samples to share with their parents, too.
Hello,
I teach multiple reading groups. How do I set up the folders so they contain the work for the individual groups… sometimes the different groups may be working on the same activity.
There are two ways you can do this, both are a bunch of work.
After assignments come in, you can move the submission to the correct folder, but you’d have to do it for each student.
If you wanted to pre-assign folders, you would need to make the activity, file it in a folder, and send it to those students. Then, you’d have to duplicate the activity, file it, assign it…etc.